
【Word・ワード】文字を縁取り(袋文字)する方法!

ワードだけだと、縁取りした文字は作れない?

いわゆる袋文字ですね、もちろんできますよ。
- 縁取り文字は「ホームタブ」→「文字の効果と体裁」→「文字の輪郭」
- 二重の縁取り文字は、テキストボックスを重ねる
【Word・ワード】縁取り文字(袋文字)とは

縁取り文字とは、その名の通り縁取りした文字のことで、文字に境界線を付けるようなイメージです。
袋文字とも呼ばれます。
これ、ペイントやフォトショップじゃないとできないと思わせといて、実はワードだけでもできちゃいます。
いつもの文字と違ってインパクトもあるし、書けるようになりたい!
ではさっそく、縁取り文字の作り方を見てみましょう。
【Word・ワード】縁取り文字(袋文字)の作り方
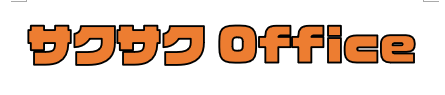
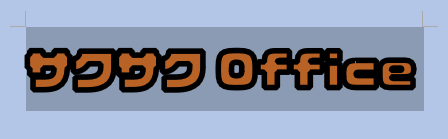
トップに完成図を載せるので、これ作りたい!ってやつのやり方をご覧くださいませ。
上にある方が簡単ではあります。
ちなみに線が太いフォントの方が、それっぽく見えますよ!
明朝体よりゴシック体ですね。
※すべて文字を書いた状態で、かつ書いた文字を選択した状態で行います。
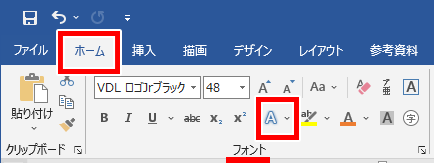
縁取り文字1、文字の輪郭を使う

コレは一番簡単で、すーぐできます。
ステップ1
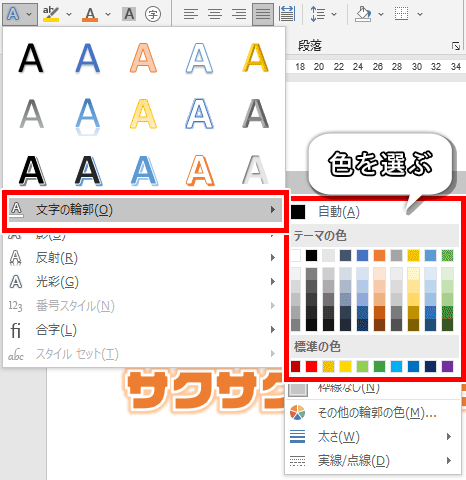
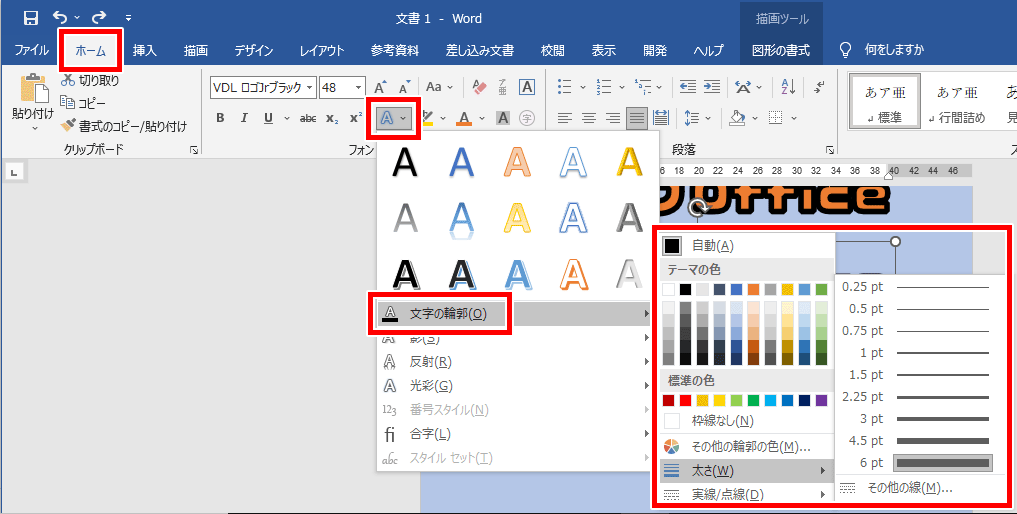
「ホームタブ」→フォントのところにある「文字の効果と体裁」をクリックします。
ステップ2
出てきたメニューから「文字の輪郭」を選びます。
そしたら、好きな色を選びましょう。
ステップ3
ちなみに「太さ」から枠線の太さを変えられます。

完了!
無事、縁取り文字ができました!
縁取り文字2、文字の輪郭を二重線にする

ステップ1
色を選ぶまでは、先ほどと同じです。
「ホームタブ」→フォントのところにある「文字の効果と体裁」をクリックします。
ステップ2
出てきたメニューから「文字の輪郭」を選びます。
そしたら、好きな色を選びましょう。
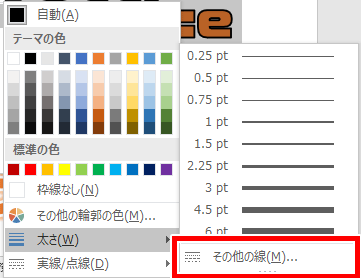
ステップ3
「太さ」→「その他の線」を選びます。
ステップ4
画面の右側に、文字の効果の設定というメニューが出てきましたね。
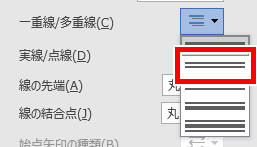
その中にある「一重線/多重線」をクリックします。

ステップ5
上から二番目の「二重線」をクリックしてください。
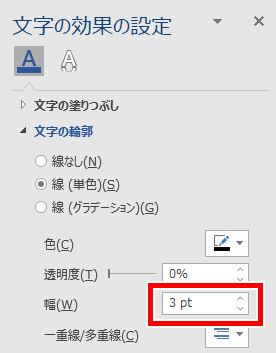
ステップ6
最後に「幅」を整えます。
画像は3ptにしていますが、お好きな幅に調整してくださいね。
完了!
無事、二重線で縁取り文字ができました!
縁取り文字3、光彩を使ってなんちゃって袋文字にする

ステップ1
これも途中までは同じです。
「ホームタブ」→フォントのところにある「文字の効果と体裁」をクリックします。
ステップ2
出てきたメニューから「文字の輪郭」を選びます。
そしたら、好きな色を選びましょう。
ちなみに例では、白にしています。
ステップ3
またまた「文字の効果と体裁」から、今度は「光彩」をクリックしてください。

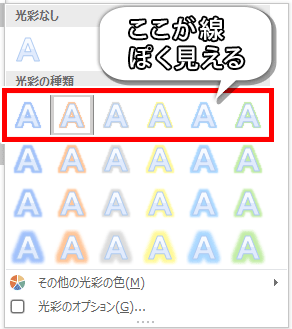
ステップ4
出てきた光彩の種類の、一番上の段から選んでください。
ここが一番線っぽく見えます。
完了!
先ほどの二重線より、袋文字っぽさがある気がします。
縁取り文字4、文字を重ねて縁取り文字にする
一番完成度は高いですが、操作が難しい…というか、長いです^^;
ステップ1
もはや定番。
「ホームタブ」→フォントのところにある「文字の効果と体裁」をクリックします。
ステップ2
出てきたメニューから「文字の輪郭」を選びます。
そしたら、一番外枠の色を選びましょう。
ステップ3
また「太さ」から、線を太くしてください。
4.5ptや6ptなど、太い方が後々いい感じに見えます。
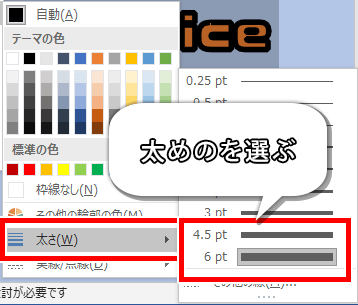
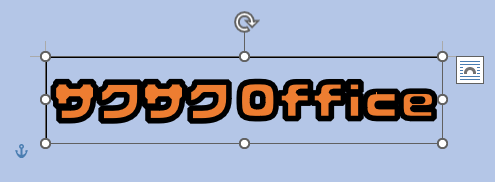
ここでは6ptにしてみました。絵的にはこんな感じ。
あとで分かりやすいように、背景色を付けてます。
ステップ4
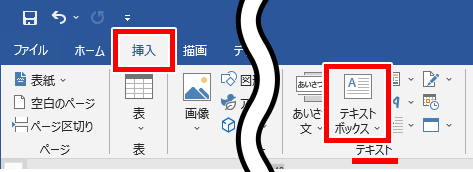
文字列をテキストボックスに変換します。
「挿入タブ」→テキストのところにある「テキストボックス」をクリックです。

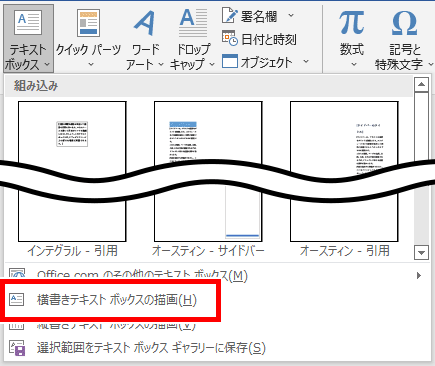
ステップ5
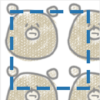
下の方にある「横書きテキストボックスの描画」をクリックしてください。。
こんな感じで回りに線や丸が付いたら、成功です。
ステップ6
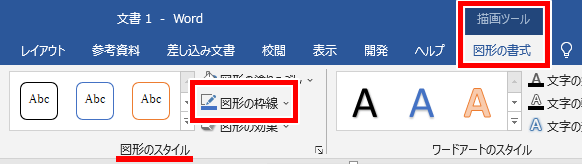
テキストボックスの枠線が気になるので、消しておきましょう。
テキストボックスを選択して、「描画ツール 図形の書式タブ」→図形のスタイルのところにある「図形の枠線」をクリックしてください。
ステップ7
出てきたメニューから「枠線なし」を選びます。
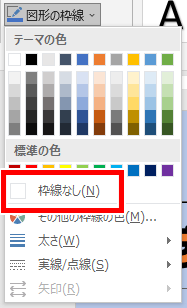
枠線を消せました。
まだまだ続きますよ!
フシュー
ステップ8
次に、このテキストボックスをコピーします。
テキストボックスの枠にカーソルを当てると、上下左右の矢印に変ります。
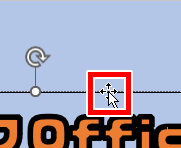
そのまま「Ctlr」を押してみてください。
ちっちゃい+のマークに変りましたね。
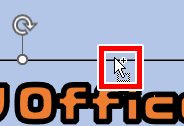
Ctlrを押したまま、コピーしたい位置までドラッグしてください。
これでコピー完了です。

「Ctrl + C」→「Ctlr + V」でもいいですよ。
その場合、2つのテキストボックスがちょうど重なるから、気を付けてね。
ステップ9
コピーして貼り付けた方のテキストボックスを選択して、最初と同じ手順で、色と太さを変更します。
色は真ん中に来る色で、太さは先ほどより細い線を選んでくださいね。
または「描画ツール 図形の書式タブ」→ワードアートのスタイルのところにある「文字の輪郭」からでも、色や太さを変えられます。
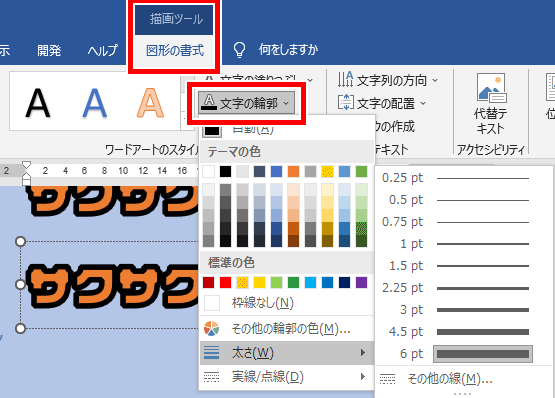
枠の色を白、太さを3ptにしてみました。
参考までに。

ステップ10
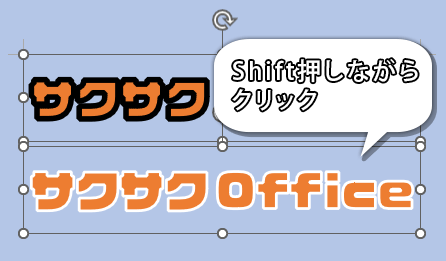
では、2つのテキストボックスを選択します。
「Shift」を押しながら二つをクリックしてください。
ステップ11
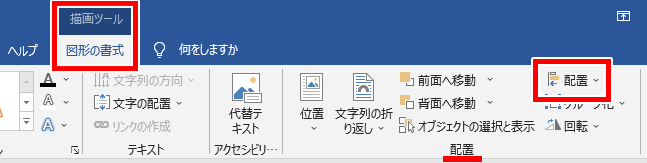
「描画ツール 図形の書式タブ」→配置のところにある「配置」をクリックします。
もうすぐ終わりそうな予感。
ステップ12
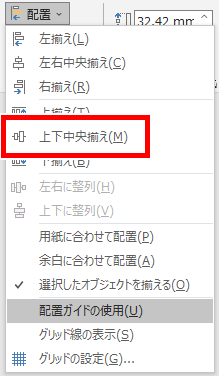
出てきたメニューから「上下中央揃え」をクリックします。
※左右もちょっとズレてる場合は「左右中央揃え」もしておきましょう。
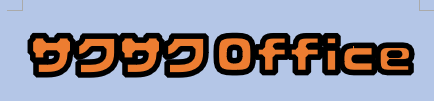
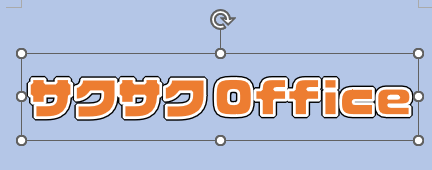
こんな感じになりました。
うーん、いいですね!
さぁ、最後の仕上げです!
ステップ13
「描画ツール 図形の書式タブ」→配置のところにある「グループ化」→出てきたメニューから「グループ化」をクリックします。
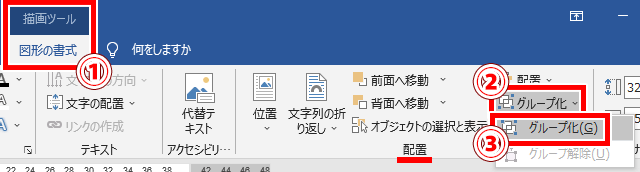
こうすることで、2つのテキストボックスを1つにまとめられるんです。
完成!
これでようやく完成です、お疲れさまでした!

テキストボックスは図形と同じように、自由に移動できますよ。
もし思い通りに移動できない場合、こちらのページをご参照ください。

長かった……、お疲れ様!
縁取り文字(袋文字)を使って、インパクトのある文字ができますね!
それでは、お疲れさまでした!
- 縁取り文字は「ホームタブ」→「文字の効果と体裁」→「文字の輪郭」
- 二重の縁取り文字は、テキストボックスを重ねる